Edge Functions closed beta

Introduction
Edge Functions are a powerful way to extend the functionality of your extension. They allow you to run serverless functions at the edge of the network, closer to your users, and provide a way to add server-side custom logic to your extension.
They are written in TypeScript and JavaScript and run on the OWN3D platform. Edge Functions are triggered by events such as HTTP requests and can be used to modify the request or response, or to perform custom logic like data validation, authentication, and authorization.
Under the hood, Edge Functions are powered by Deno, the most productive, secure, and performant JavaScript and TypeScript runtime. Used by companies like Slack, GitHub, Google, and many others. Deno is backwards compatible with Node.js built-in APIs and over two million modules on npm. Bring the best of the Node.js ecosystem with you to Deno.
Use Cases
Store and Retrieve Data from the Key-Value Store
Edge Functions can be used to store and retrieve data from the Key-Value Store. This is useful when you want to store small amounts of data, such as settings, preferences, and other small pieces of data.
To learn more about the Key-Value Store, see the Key-Value Store documentation.
import { connect } from 'jsr:@gz/kv';

const kv = await connect();

kv.set(['user', '1'], {
    id: '1',
    name: 'John Doe',
    email: 'john@example.com'
});
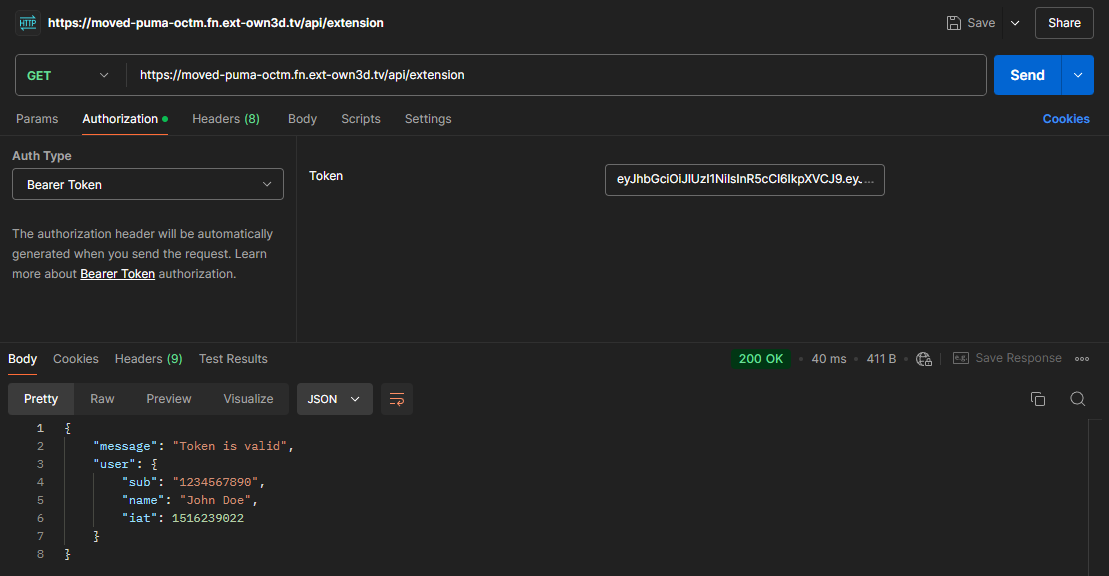
User Authentication
Edge Functions can be used to authenticate and authorize requests to your extension. This is especially useful when you want to protect your extension from unauthorized access.
Tips
You can use JavaScript modules from npm in your Deno programs with the "npm:" specifier in your import statements.
import { decode } from 'jsr:@gz/jwt'
import express from 'npm:express'

export const verifyToken = async (req, res, next) => {
    const authHeader = req.headers.authorization;

    if (authHeader && authHeader.startsWith('Bearer ')) {
        const token = authHeader.substring(7, authHeader.length);

        try {
            // Add the decoded token to the request object
            req.user = await decode(token, 'secret', {algorithm: 'HS256'});
            next(); // Proceed to the next middleware or route handler
        } catch (_err) {
            return res.status(403).json({ message: 'Invalid token' });
        }
    } else {
        res.status(401).json({ message: 'No token provided' });
    }
};

const app = express();

app.get('/api/extension', verifyToken, (req, res) => {
    res.json({
        message: 'Token is valid',
        user: req.user // Use the decoded token information from the middleware
    });
});

app.listen(80, () => {
    console.log(`Server running on port 80`);
});
Getting Started
Getting started with OWN3D Edge Functions is easy. The installation process is simple, and you can start writing and deploying your Edge Functions in minutes using our CLI tool.
If you haven't already our CLI tool, you can follow the instructions in the CLI installation guide.
Write and test a Deno program
You can write a simple Deno program and run it using the following command:
Deno.serve(() => new Response("Hello, world!"));
You can run the program using the following command:
deno run --allow-net server.ts
Deploy Functions using the Developer Console
Create a New Edge Function
To create a new Edge Function, start by accessing the Developer Console and navigating to the Edge Functions section. Click on the "Create Edge Function" button, which will open a new form for entering your function details.
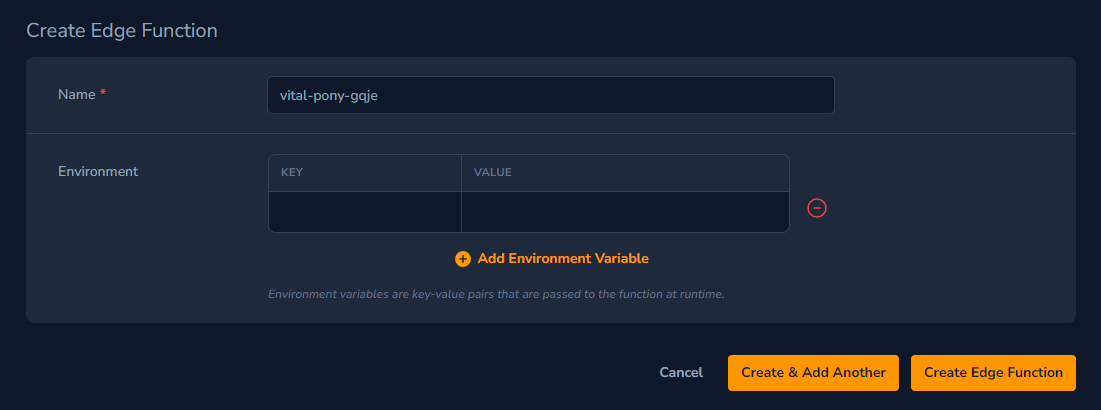
First, you’ll need to provide a name for your Edge Function. This name will be part of the URL where the function is deployed; for example, if you name it "my-function," it will be accessible at my-function.fn.ext-own3d.tv. By default, we will generate a unique URL for your function, but you can also specify a custom URL if you prefer. Additionally, you can specify any environment variables that will be available to your Edge Function.
Deploy Functions using the OWN3D CLI
Warning
The CLI tool is currently in closed beta. We recommend using the Developer Console to create and deploy Edge Functions until the CLI tool is available to the public.
Creating and deploying Edge Functions using the OWN3D CLI allows you to create more complex Edge Functions with multiple files and dependencies. The CLI tool provides a simple way to create, deploy, and manage your Edge Functions without the need to use the Developer Console.
Create a New Edge Function
To create a new Edge Function, you can use the fn:create command from the OWN3D CLI. This will create a new directory with a basic Edge Function template.
own3d fn:create my-function
This will create a new directory called my-function with the following structure:
my-function
├── .gitignore
├── .own3d
│   └── manifest.json
└── index.ts
Deploy the Edge Function
To deploy the Edge Function, you can use the fn:deploy command from the OWN3D CLI.
own3d fn:deploy my-function
This will deploy the Edge Function and provide you with the URL where it is deployed.
- Compressing my-function function...
  updating: .own3d/ (stored 0%)
  updating: .own3d/manifest.json (deflated 24%)
  updating: index.ts (deflated 27%)
✔ Function compressed
- Deploying my-function function...
✔ Deployment is live!

Website URL: my-function-xxxxxxxxxxxx.fn.ext-own3d.tv
Website URL: my-function.fn.ext-own3d.tv
Now, you can use the URL to trigger the Edge Function.